How do I issue Growth Shares on Vestd?
This guide covers designing a growth share scheme and issuing the growth shares.
Before you can issue growth shares, you need to make sure your Articles of Association are suitable for growth shares, you have a hurdle valuation, and have authorised a growth share pool.
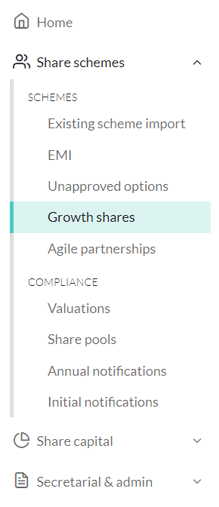
First, log in to Vestd, and go to Share schemes > Growth shares via your homepage or side navigation bar:
This will take you to the following page, where you'll see how many growth shares you have available to distribute.
If you already have a growth share scheme set up, you'll also see them here. If you'd like to use an existing scheme but need to change some details, like the vesting schedule or criteria, click Duplicate on the chosen scheme. This will copy over the scheme's rules so you don't have to create a new one.
Click Create a new share scheme to begin designing the scheme (If this button is not there, you need to authorise growth shares).

Please note: We've improved our growth share scheme design process to explain everything as you go, which is why your screen looks different to the images below. If you want to create your scheme while following this help guide, switch to advanced mode on the right of your screen.
First, choose a name for the scheme. The next section down will show you the hurdle rate you entered earlier, and will ask you to enter the criteria recipients must meet:

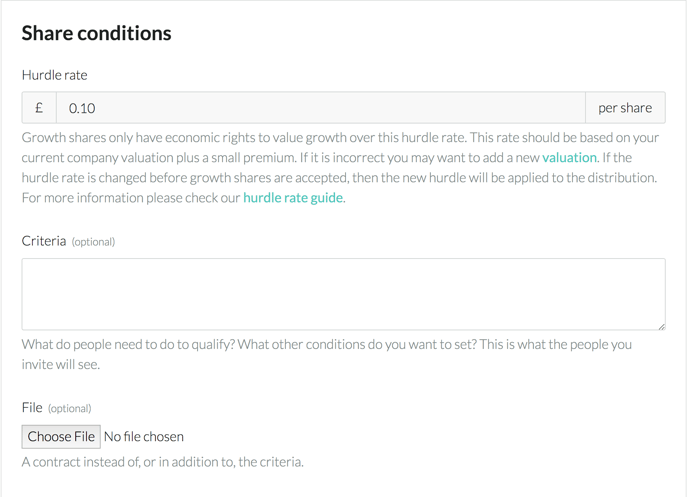
When you're setting up individual distributions later on, you'll be able to give people personalised criteria, so what you enter here can be fairly general, something as simple as "Recipient must remain an employee of the company" will do just fine.
Almost there! Now you need to set the vesting schedule (if you want to set one).
If you choose not to use one and not to have the shares vest automatically, vesting of the options will be entirely manual and in your control.
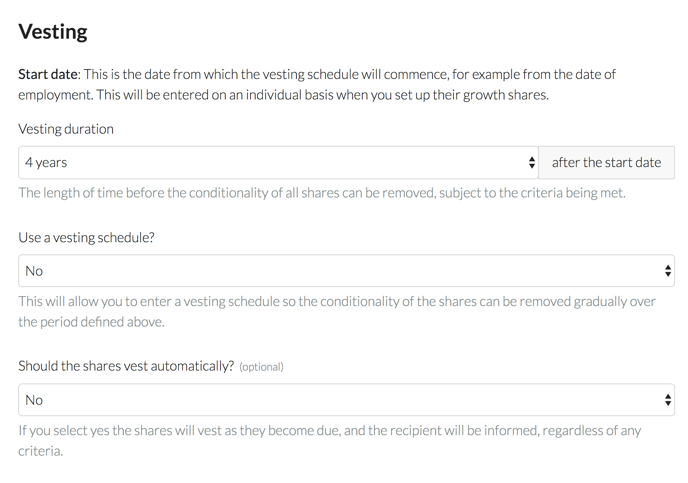
You'll still need to set a vesting duration however. This is the date by which all of the growth shares will vest (become unconditional) if the criteria are met. If you do choose to use a vesting schedule, the page will look slightly different:
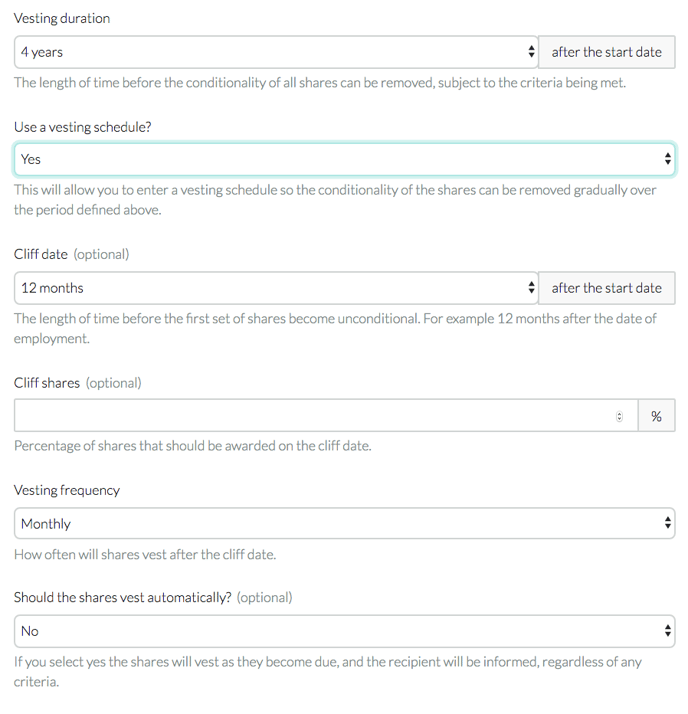
The cliff date is the date on which the recipient will receive their first set of vested growth shares. The cliff shares percentage defines what percentage of their total shares becomes available on the cliff date. The vesting frequency is how often the shares vest after that: Monthly, quarterly, bi-annually, yearly.
If you selected manual vesting, you'll need to issue the shares manually as they become due (you can still switch to automatic vesting at this point).
Once this is done, click Save at the bottom of the screen.
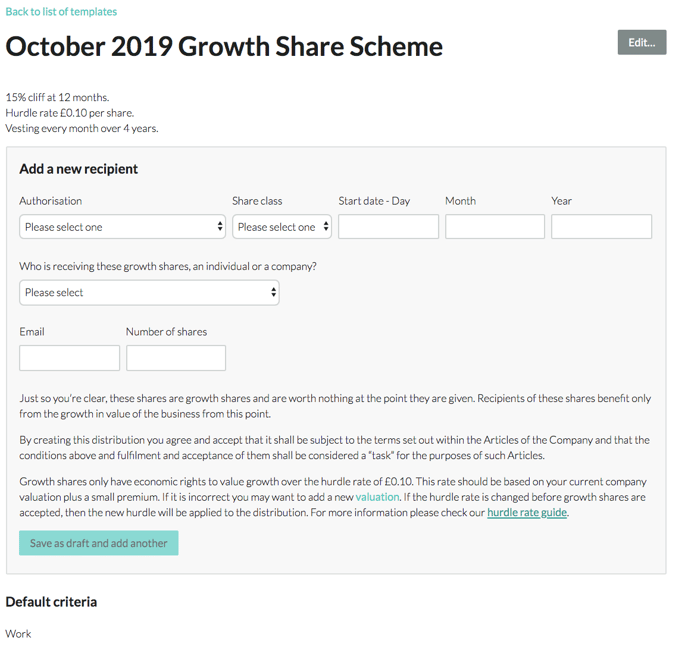
Congratulations, you've created a growth share scheme! Nothing is set in stone until invites are sent to recipients, so if you need to make a change to the scheme itself, go to Growth shares > View your schemes and distribute shares and click Edit on the scheme you want to change (a scheme becomes 'locked' once you send out invites). 
Now to start adding recipients, select the share pool you want to issue the shares from, whether you want them to be voting (Vv) or non-voting (Vn), and a start date for the vesting schedule.
Next, if the recipient is an individual you'll need to provide their name, email address, number of shares, and, if they're a UK employee, an NI number. If you're issuing to a company, enter the company name and email address.
Click Save as draft and add another to create a draft of the distribution and add more recipients. Nothing will be sent out just yet.

Click on the recipient's name to go to their Agreement summary.
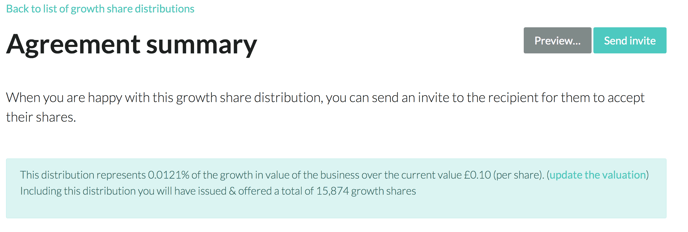
Double check everything is correct and if you need to change any details just click Edit to the right of the recipient's name. You can also upload additional documents by clicking Upload.
The Agreement summary will also show you the vesting schedule:
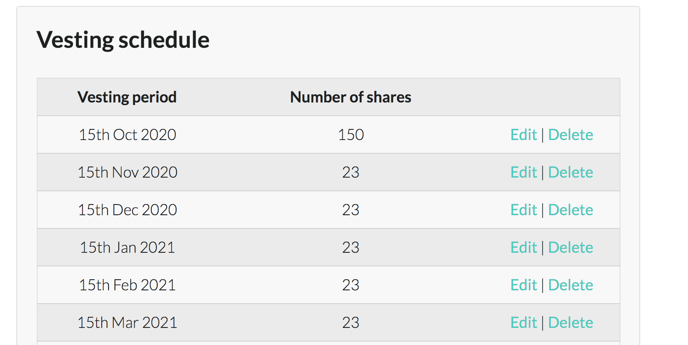
The platform will automatically split the remaining shares after the cliff into equal tranches until the final vesting date. You can, however, customise each tranche. Just click Edit on the tranche you want to change:
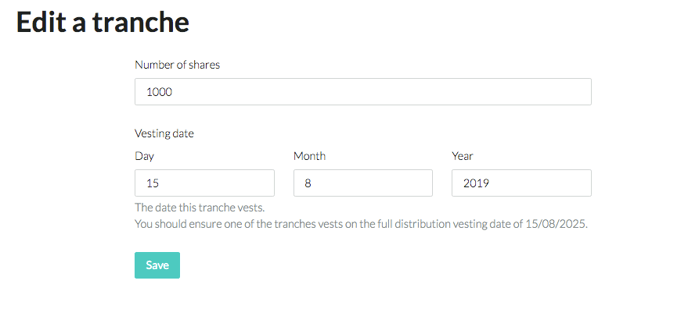
Here, you'll be able to change the number of shares, and the date the tranche will vest.
Once you're happy, go back to Agreement summary and click Send invite. We'll then send an email invite to all recipients to accept their growth shares.
It's worth noting that you can continue editing the scheme design and individual option agreements until the first invite is sent, so make sure everything is correct before sending out invites.
Important: The recipient must pay the company the nominal value of the growth shares upon acceptance. This payment will need to be taken off-platform. Once the recipient accepts the growth shares, we'll send an SH01 to Companies House which will state the price paid per share as £(NV).
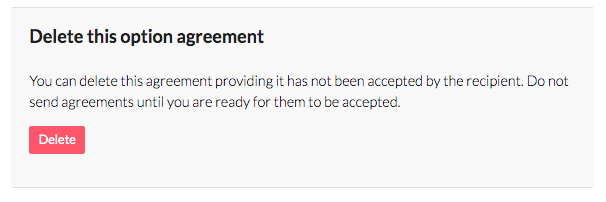
Provided you haven't yet sent the invite, you can cancel the whole thing by clicking Delete at the bottom of the page.
All done! You've designed a growth share scheme and issued growth shares on Vestd!
Our team, content and app can help you make informed decisions. However, any guidance and support should not be considered as 'legal, tax or financial advice.'