Electronic Document Witnessing with Vestd
A Step-by-Step Guide to Using Vestd's Electronic Witnessing Feature for Secure and Compliant Document Signing
Do you have a document that needs to be electronically witnessed? Well, great news! You can now use the Vestd platform to fulfil your electronic witnessing needs.
If you are unsure whether your document needs a witness signature, we would recommend seeking legal advice. But we have compiled a list (by no means exhaustive) of the the type of documents that might need witnessing:
Documents that might need witness signatures:
Shareholder agreements
Share supply agreements
Share subscription agreements
Powers of attorney, including lasting powers of attorney
Transfers of land or interests in land
Some leases
Mortgages and charges
Sales by mortgagee
Certain actions under the Trustee Act 1925 (TA 1925)
Bills of sale
Any agreement that is made without consideration.
A gift of tangible goods, without delivery of possession
An express release of certain rig
Please do seek legal advice if you are unsure whether your document needs witnessing.
Ok, on to how Vestd will make your life easier with our witnessing feature.
Getting Started with Vestd's Witnessing Feature
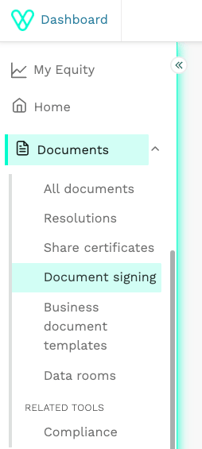
1. Navigate to Document signing: Log in and go to the Documents > Document signing

2. Start the workflow: Click 'Add a new document'

3. Upload your document: Click 'browse' and select your document from your files

4. Select Document Type: Once your document is uploaded, choose the document type from the drop-down list. Then, tick the 'This document requires witness signatures' box.

5. Check the box: Tick 'This document requires witness signatures'
![]()
6. Provide Context (OPTIONAL): Use the description box to provide additional context for yourself and other admin users. This will help when the document is signed and saved to your ‘All Documents’ page.

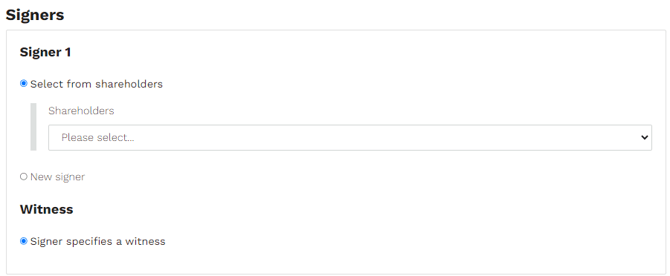
7. Select a Signer: Choose a signer from your existing shareholders.

or click 'New signer' to add a new contact. Enter the signer’s first name, last name, and email address. To add more signers, click 'Add another signer'.

To add more signers, click 'Add another signer'. When you're done, click 'Continue'.

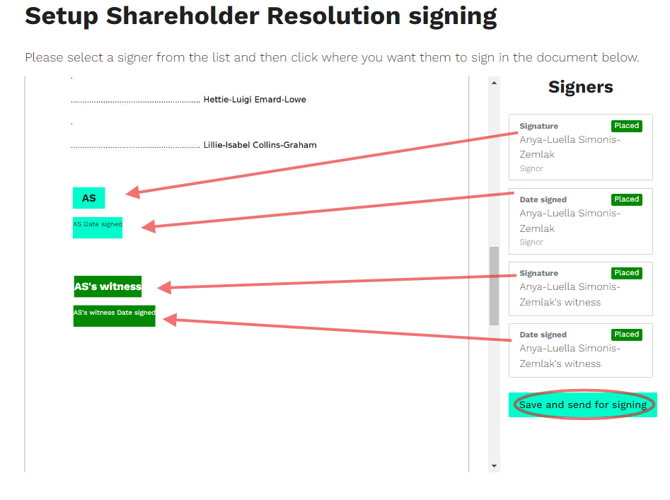
8. Place Signatures: Click on the signer’s name and then click on the document where the signature should be placed. You can also add an optional date field. Once satisfied, click 'Save and send for signing'.

9. Specify your witness: When the signer receives the document via Docusign, they will be prompted to select their witness and enter their details.
-png.png?width=474&height=366&name=image%20(1)-png.png)
The witness will receive an email with the document to sign and a message indicating who requested their signature. While their name and email address will be prepopulated, they will need to enter their occupation and address.
Track Document Status: On the 'All Documents' page, you can track the signing status of the document.
And that's it! Your documents are securely sent for signing and witnessing.
Vestd makes it easy to handle your electronic witnessing needs with a simple, user-friendly process.
*Our team, content and app can help you make informed decisions. However, any guidance and support should not be considered as 'legal, tax or financial advice.'