Whether you’re prepping for an investment round or exit event, there’s no doubt there will be dozens of legal documents and draft agreements. There are bigger things to worry about than where all the docs are, or whether their lawyers have the latest agreement.
At Vestd, we’re all about making business transactions – and your life – easier.
That’s where data rooms come in. It’s the secure, single source of truth for all the essential documents, which helps keep everyone up to speed and ensures only those who need access, get access.
How do I create a data room?
Once you’re logged into Vestd, go to Documents > Data rooms via your side navigation. This is where you can create new data rooms and manage existing ones.
First, give your data room a name. Something that explains what the room is for is a good start, like ‘Series A Investment Round’ or ‘Exit prep.’
Inside the data room, you can create folders or add documents straight into the room. As you may quickly realise, the documents come thick and fast, so it makes sense to organise everything into folders sooner rather than later.
The screenshot below is a common data room template for when you’re organising an investment round.

You'll also see this template in your Vestd data room. Feel free to use, rename and edit it as you need.
Adding documents
When adding documents to your data room, you can add them directly to the data room or in the folders you’ve nicely organised. To add them to folders, just click into the appropriate folder and voila.
You’ll be asked whether you want to add a document that’s already on Vestd, such as signed resolutions, board minutes and valuations, or upload a new document from your device.
Of course, documents already on Vestd are accessible via the All Documents folder, and users with access to documents will be able to see them. You can change these settings in user permissions.
However, when uploading new documents, you will be asked whether it’s a sensitive document or not. If it is, mark the document as sensitive so it’s only stored in the data room.
If not, the document will also be accessible via All Documents.
Simply select the document type, then you’ll be asked to upload the file and enter a few details about the document depending on its type.
Then, click Save and the document will be stored in the appropriate folder/data room.
How do I add people to my data room?
Each data room tells you which users have managing access through their admin user permissions, and which users are viewers of this data room only.
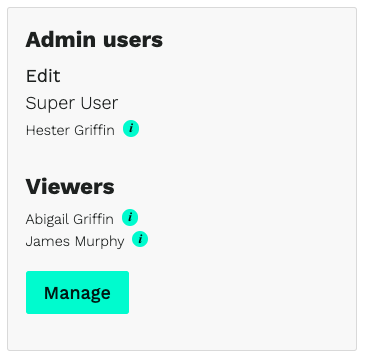
To invite a new Viewer, just click Manage, where you will need to enter the name and email of the individual you want to view this data room.
If you're adding a user who isn't already on Vestd, they will receive an email invite to join the platform and access the data room. You can also revoke access at any time by clicking Manage and removing users from the access list.
To add an admin user to help you create and manage all your data rooms, this guide explains how to create roles and invite users to Vestd.
Our team, content and app can help you make informed decisions. However, any guidance and support should not be considered as 'legal, tax or financial advice.'